What you'll build
You'll build a styled web app that uses Bulma's CSS framework.
It'll have the following features:
What you'll learn
- Creating multiple HTML files
- Linking HTML files together by creating a nav menu
- Vocabulary for describing your HTML and CSS code
What you'll need
- A browser (Chrome is recommended because it's the most fully featured and common)
- Node.js
- A GitHub account
- GitHub Desktop and Visual Studio Code
Open your code
- Open GitHub Desktop
- Check the Current Repository in the top left is your project
- Click the Open in Visual Studio Code button (or press
Command+Shift+Aon MacOS orCtrl+Shift+Aon Windows)
Start your dev server
- Open a new Terminal by clicking New Terminal in the Terminal menu, or pressing
Ctrl+` - Start the server on your laptop by entering the command
npm run dev - Open the link that it creates to view your site
Now you're ready to get coding!
CSS frameworks are collections of CSS code that you can use and reuse to build your site quickly, and know that it will work.
CSS can be tricky to write because you need to test on multiple browsers, devices, and screen sizes. CSS frameworks have already done this testing for you, so you can be confident that your site will look good no matter where it's being accessed from.
Bulma is one of many CSS frameworks, and the one we'll be using for this project. Bulma is easy to use, and is already built into the project you're working on. It exclusively uses classes - add the class to the HTML and it'll get styled.
Try updating your Header.svelte to use Bulma, instead of hand-written CSS. We'll use the Bulma Hero banner instead.
- Delete your entire
styleelement - Add the
heroclass to yourheaderelement - Add a new
divelement inside yourheaderand give it the classhero-body - Add the
titleclass to yourh1element - Add a subtitle with the
subtitleclass
<header class="hero">
  <div class="hero-body">
    <h1 class="title"> Main heading </h1>
    <h2 class="subtitle"> Subheading </h2>
  </div>
</header>.title {
font-weight: bold;
font-size: xx-large;
}View your new header in your browser. It might seem a bit plain but it's now much more robust and will display nicely on mobile and desktop browsers.
Customise
You can change your hero header by adding more classes.
- Change the colour by adding one of these:
is-light
is-dark
is-primary
is-link
is-info
is-success
is-warning
Is-danger
- Change the size by adding one of these:
is-small
is-medium
is-large
is-halfheight
is-fullheight
All of your components can benefit from the Bulma framework's classes.
Try using Bulma's Footer documentation to style your own Footer component.
Remember to comment out your own style element first. You can do this by highlighting it and pressing Command + / or Ctrl + /
Customise
Change your things to personalise your web page.
Every page can use Bulma, and if you get familiar with it, a CSS framework can save you hours of coding and testing.
- Comment out the
styleelement on your home page - Add the section class to your
mainelement - Add the content class to your
mainelement
<main class="content section">
  ...
</main>The documentation page for the Navbar goes into a lot of detail very quickly, but we'll work through it a little at the time.
- Comment out any
styleyou've written for yourNavcomponent - Add the
navbarclass to yournavelement - Add the
navbar-itemclass to your link (a) elements
<nav class="navbar">
  <a class="navbar-item" href="/"> Home </a>
  <a class="navbar-item" href="/page-2"> Page 2 </a>
</nav>
Customise
You can change your navbar by adding more classes.
- Change the colour by adding one of these:
is-light
is-dark
is-primary
is-link
is-info
is-success
is-warning
Is-danger
- Change the position by adding one of these:
is-fixed-top
is-fixed-bottom
- Change other looks by adding one of these:
is-spaced
has-shadow
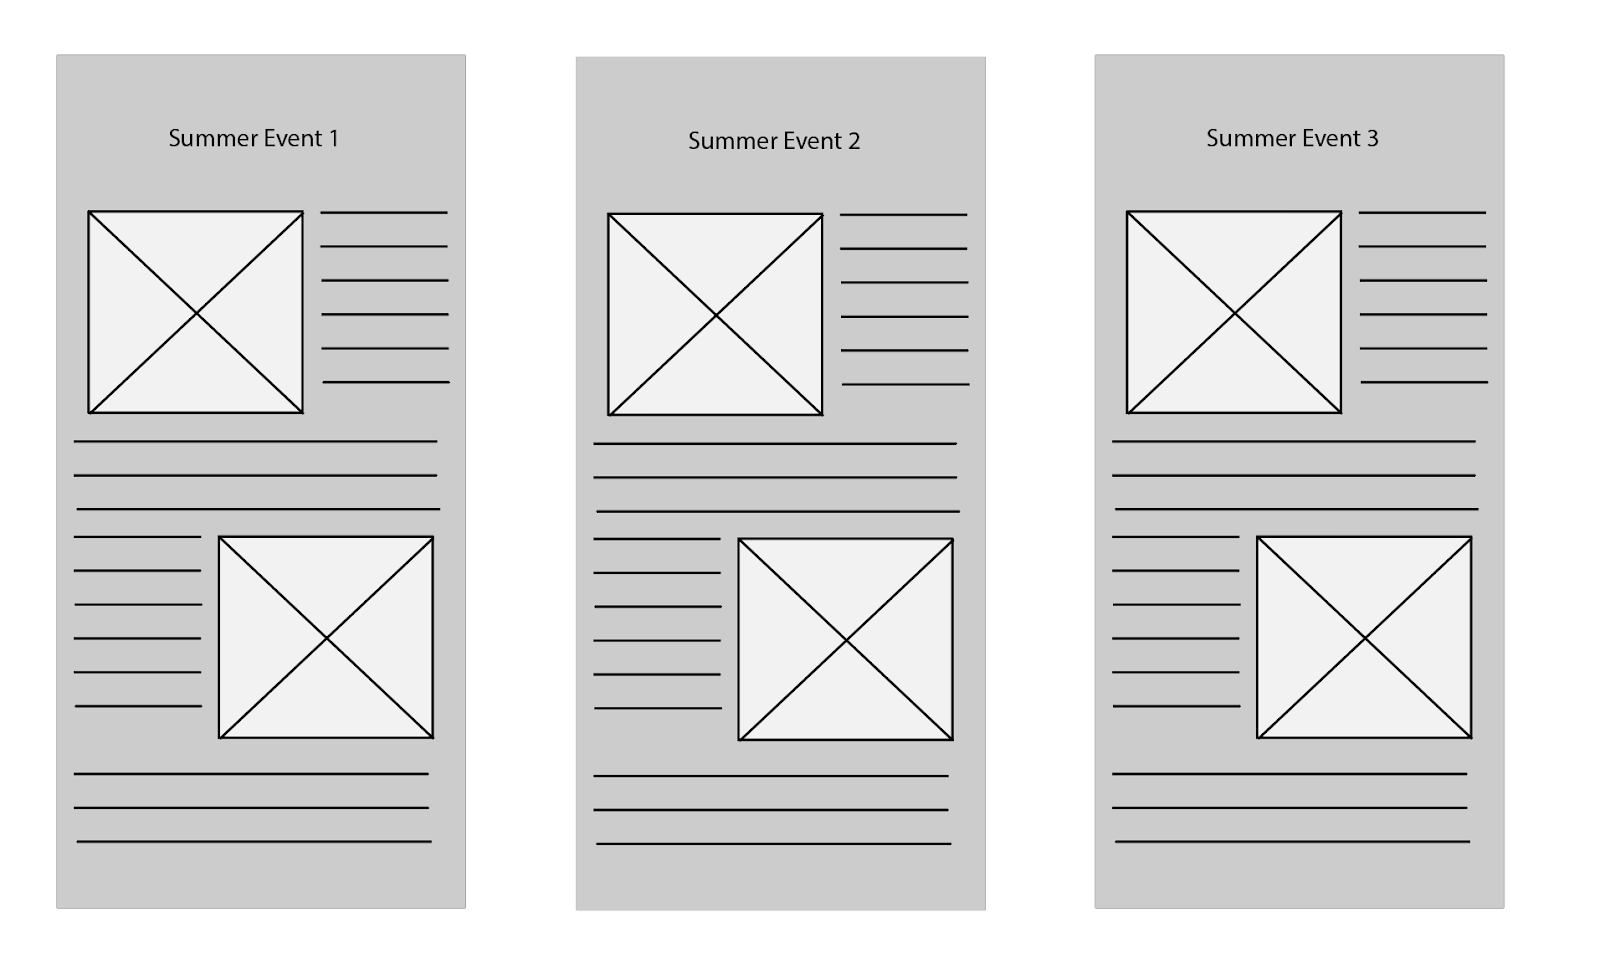
A common web page layout uses multiple columns to show information. Bulma makes creating columns easy - you just need divs and a couple of CSS classes.
When you're developing any kind of software - whether it's for web, mobile, or anything else - you'll often need to refer to documentation. When you learn to read the docs, the possibilities of what you can build expand greatly.
Read the docs on Bulma columns, then see if you can implement them yourself to create this layout:
Using Bulma's media card component, try creating a short profile for yourself that you can put on the main page, or in your footer.
You should create this as its own component in a file called Card.svelte or similar. You can then import and use the component wherever you want in your project.
<div class="card">

  <div class="card-image">
    <figure class="image is-4by3">
      <img src="https://bulma.io/images/placeholders/1280x960.png">
    </figure>
  </div> <!-- .card-image -->

  <div class="card-content">

    <div class="media">

      <div class="media-left">
        <figure class="image is-48x48">
          <img src="https://bulma.io/images/placeholders/96x96.png">
        </figure>
      </div>

      <div class="media-content">
        <p class="title is-4">Jane Smith</p>
        <p class="subtitle is-6">@janesmith</p>
      </div>

    </div> <!-- .media -->

    <div class="content">
      Lorem ipsum dolor sit amet, consectetur adipiscing elit.
      Phasellus nec iaculis mauris. <a>@bulmaio</a>.
    </div> <!-- .content -->

  </div> <!-- .card-content -->
</div> <!-- .card -->Congratulations, the third iteration of your web page is complete.
You've taken the code provided and customised it to create your unique site.
Along the way, you've learnt about these parts of coding.
(➕ means new things in this project)
Svelte
componentsfor reusable blocks of code
Bulma
classesfor using Bulma's pre-written CSS
From here, you can take your page further, if you like, by adding images from your summer, links to your social media, YouTube channel, blog, or whatever you like.
In your coding career you will often need to look up how to do things. In this section are a couple of websites to help you find information online about how to do what you want to do.
Most frequently, a good Google search will be the best option. Remember to include the keywords "HTML" and the thing you want to do, so that Google will give you the best results (skip past the ads though!).