What you'll build
You'll build a web page about your summer that is styled with CSS.
It'll have the following features:
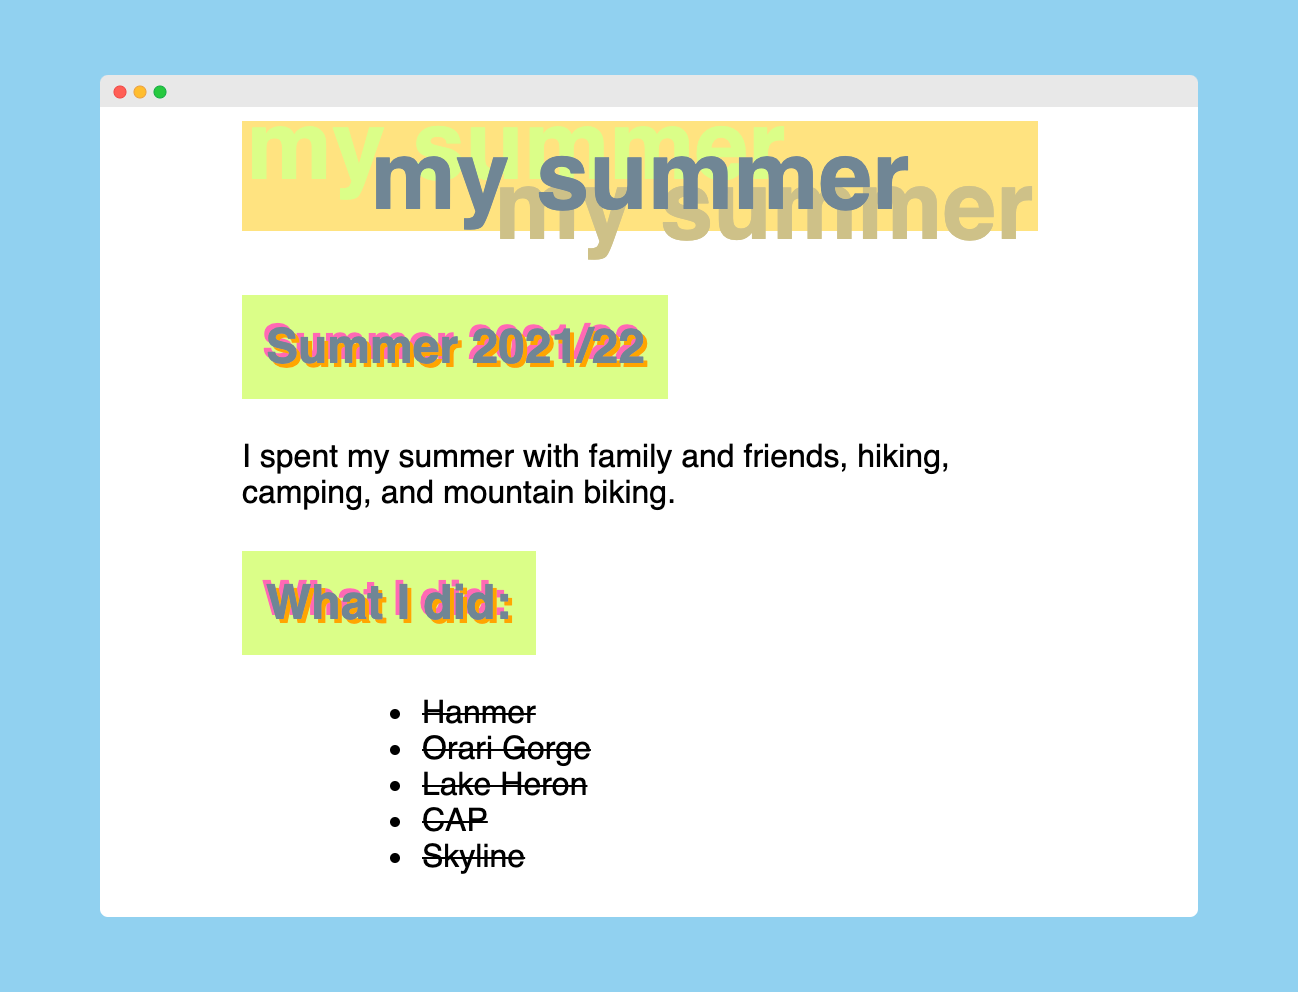
Here's what it might look like:
What you'll learn
- CSS for styling your HTML elements
- Vocabulary for describing your CSS code
What you'll need
- A browser (Chrome is recommended because it's the most fully featured and common)
- A GitHub account
- GitHub Desktop and Visual Studio Code
Open the assignment
- Open your GitHub Classroom assignment from the link in Google Classroom
- Check that you're logged in with your GitHub account
- Check the name of the assignment is correct and then accept it. GitHub will make a copy of the template for you.
- Click on the link to your repository
Get ready to code
- Click on the green Code button and choose Open with GitHub Desktop
- If you're working locally (on your own device), choose a place (such as Documents) to download your code to
- Once it has cloned to your computer, click the Open in Visual Studio Code button (or press
Command+Shift+Aon MacOS orCtrl+Shift+Aon Windows) - Open the file called
index.html
Now you're ready to get coding!
Read over your code in the template, and then add opening and closing HTML tags to create heading elements and a paragraph element.
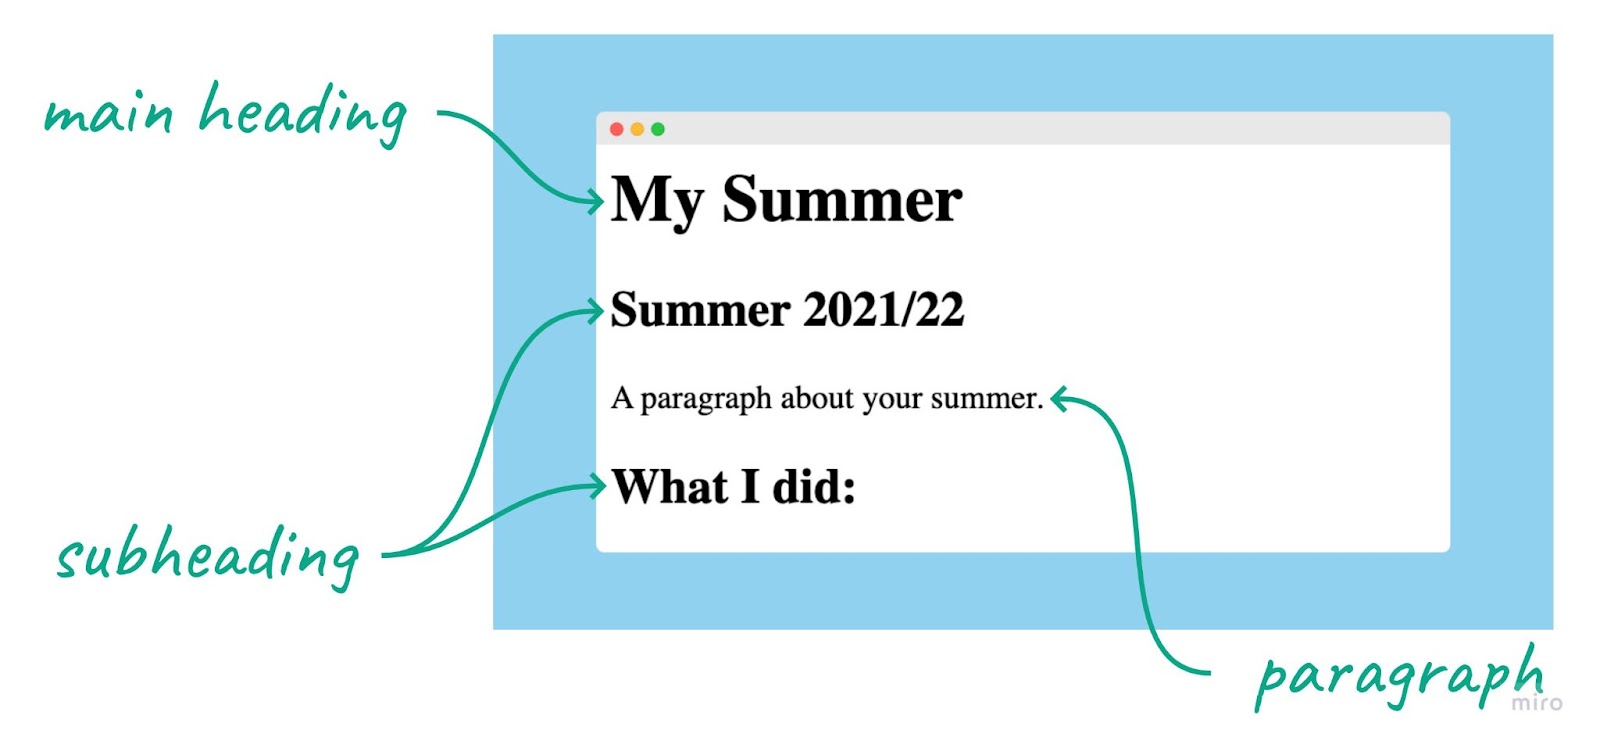
Open your index.html file in your browser to check that it looks the way you expect.
Customise
Change your two heading elements to personalise your web page.
- Change the text inside your heading 2 element so that it has where your summer was
- Change the text inside your paragraph element so that it has a little about your summer
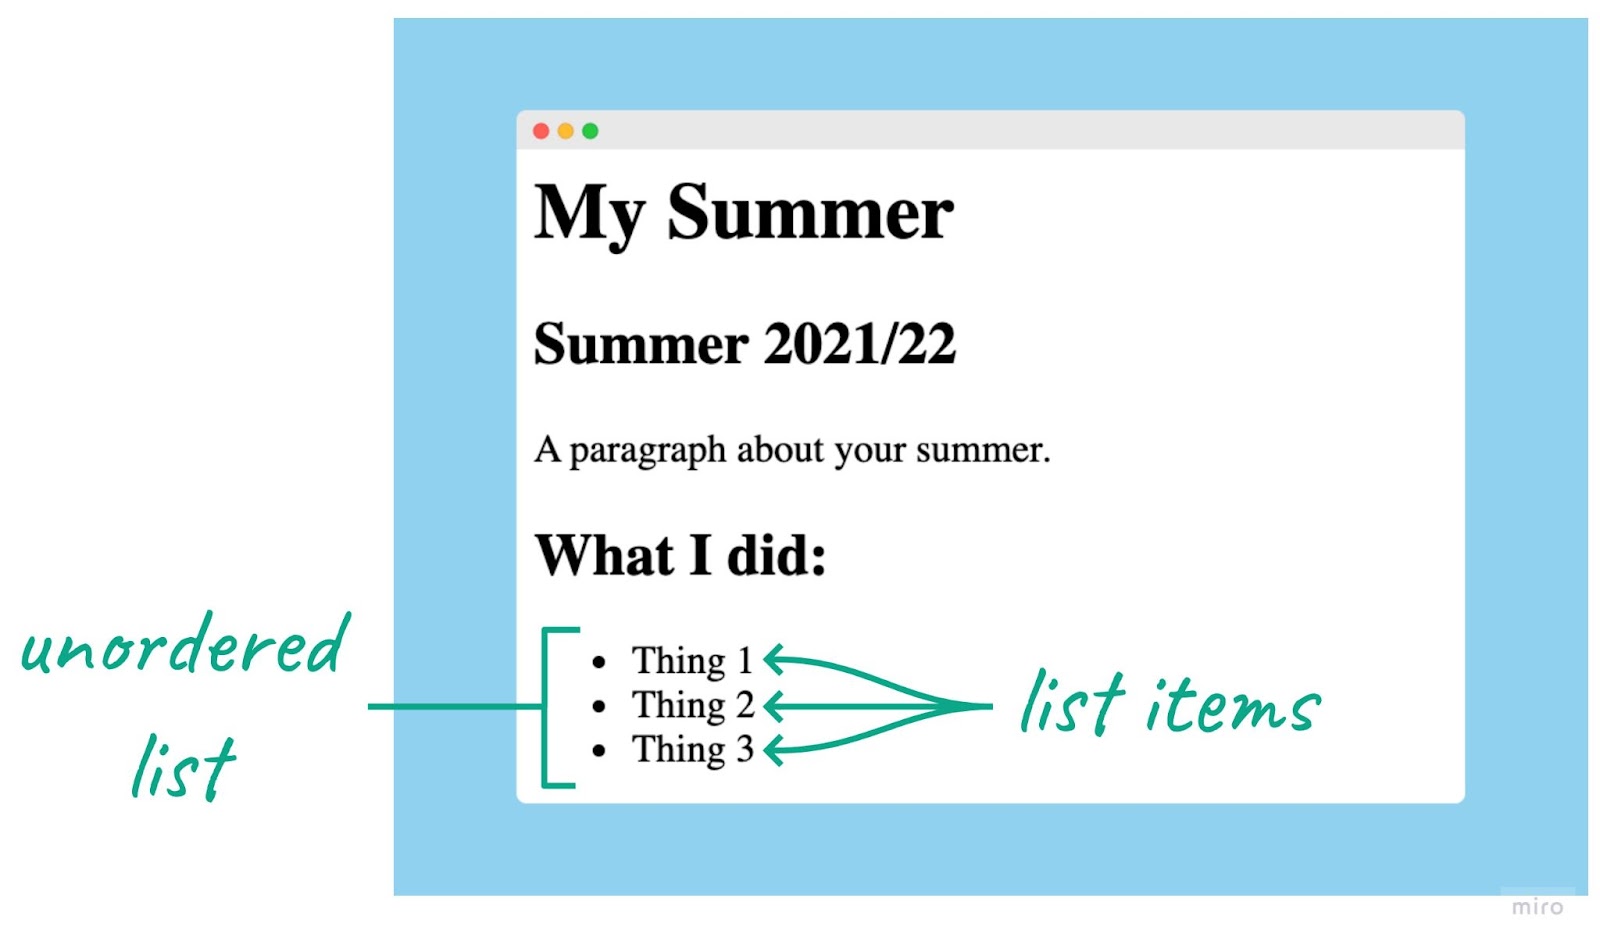
Write some HTML code to add a list of the things you did over the summer. The elements are shown in this screenshot to help guide you.
Customise
Change your list item elements to personalise your web page.
- Change the text inside each list item element so that they have a little about your summer
- Add more list item elements if you need to
Copy and paste this code at the very bottom of your index.html file:
<style>

</style>
The style element is ready and now it's time to write some CSS!
Copy and paste the rule below for the heading 1 element into your style element.
<style>
  h1 {
    background: blue;
  }
</style>You can add background colours to any of the other elements on your page, for example:
<style>
  h1 {
    background: blue;
  }

  h2 {
    background: green;
  }
</style>
Customise
Change your background colours to personalise your web page.
- Add rules for your headings and paragraphs, and the list if you like
- You can choose from this list of colours, or you can create a palette using a website like coolors.co (you'll need to use the hex codes in place of the colour names in your CSS).
We've completed half of the features we planned at the beginning!
Each element isn't limited to just one rule. You can add as many rules for as many elements as you wish.
Add the new code below to your h1 CSS.
h1 {
  background: blue;
  font-family: sans-serif;
  font-size: 3em;
  color: orange;
}Save your file and refresh your page in your browser. The main heading should be in a different font, a little bigger, and orange.
If nothing has changed, check:
- spelling is all correct
- syntax like colons (
:) and semicolons (;) is all correct
Customise
Change your text to personalise your web page.
- Change the color of your main heading to something less eye watering.
- Add some rules for your subheading (
h2) and paragraphs (p). - Try out some additional style rules:
text-align: center;
text-decoration: line-through;
text-transform: uppercase;
text-shadow: 2px 2px orange;
In design, it's important to give space between the things your audience is looking at. This helps make it less busy and cluttered, and more pleasant to use.
Add this CSS rule to your h2:
margin-left: 10%;In your browser, your subheadings should now be spaced out from the side of the page.
Add the same rule for your paragraph elements to put them in line with the subheadings.
Customise
Change your spacing to personalise your web page.
- Change the margins around each of your elements to suit your taste
- Try changing some of these properties:
margin-top
margin-bottom
margin-left
margin-right
padding-top
padding-bottom
padding-left
padding-right
Congratulations, the first iteration of your web page is complete.
You've taken the code provided and customised it to create your unique web page.
Along the way, you've learnt about these parts of coding.
(➕ means new things in this project)
HTML code
h1for main headingsh2for subheadingspfor paragraphsulfor unordered lists (bullet points)lifor list items inside an unordered list
➕ style for CSS styling
HTML vocabulary
- tag - a single piece of HTML code inside pointy brackets, i.e.
<and> - element - a component of the webpage, such as a heading or paragraph, inside an opening tag and a closing tag
CSS code
➕ background: to change the background colour of an element
➕ font-family: to change what letters look like
➕ font-size: to change the size of text
➕ color: to change the colour of text
➕ text-align: to move text to the left, centre, or right
➕ text-decoration: to add or remove underlines and line-throughs
➕ text-transform: to change text to all uppercase or lowercase
➕ text-shadow: to add a shadow to text
➕ margin-(top, bottom, left, right): to add space around the outside of an element
➕ padding-(top, bottom, left, right): to add space around the inside of an element
CSS vocabulary
➕ selector - the start of the chunk of CSS that says what HTML element it's for
➕ property - the thing you're going to change about the HTML element
➕ value - what you want to change the the property to
From here, you can take your page further, if you like, by adding links to your social media, YouTube channel, blog, or whatever you link.
In your coding career you will often need to look up how to do things. In this section are a couple of websites to help you find information online about how to do what you want to do.
Most frequently, a good Google search will be the best option. Remember to include the keywords "HTML" and "links" so that Google will give you the best results (skip past the ads though!).
- Try this one: Google search
Another common website to use is W3 Schools. They have simple tutorials and explanations on how to do things, as well as interactive examples.
- Try this tutorial: W3 Schools HTML Links
Elements on a web page can be in different states, such as being hovered over.
Copy and paste this code into your style element:
h1:hover {
  background: yellow;
}
Open your page in the browser and hover over your heading with your cursor.
Experiment with :hover
- Can you add styles?
- Can you remove styles?
- Does hover work on other elements?